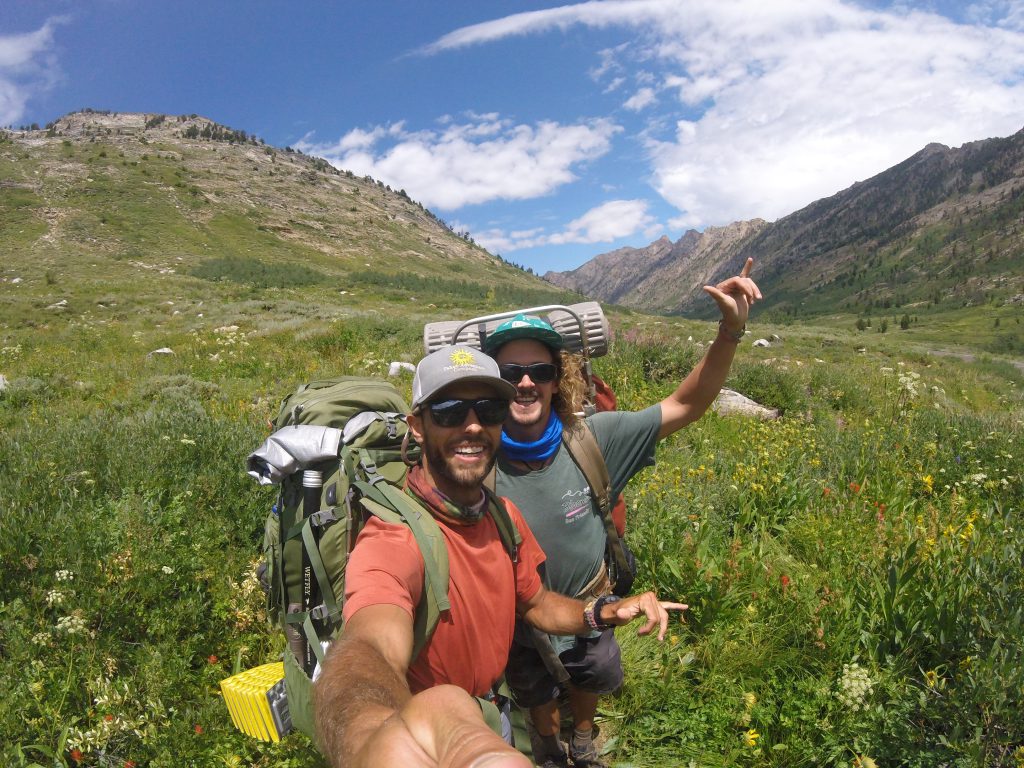
My great friend (@jabroniejoe & @highsierrawildflowers) and I recently went out for a 6-day, 5-night backpacking trip hiking in the Ruby Mountains on the Lakes Loop Trail. The dates of this trip were the 23rd through the 28th of July, 2018.
The Ruby Mountains are a gem in the middle of Nevada. This strip of mountains began uplifting about 20 million years ago and, today, they are a strip about 90 miles long and 12 miles wide.
The last good city to make a pitstop in on your way to Lamoille Canyon, which is one of the more accessible trailheads in the wilderness area, is Elko.
This is our account of hiking in the Ruby Mountains on the Lakes Loop Trail, along with photos and recommendations so that other brave (and maybe slightly crazy) souls might follow this “trail” one day in the future. We hope you enjoy!
Article Overview
Hiking in the Ruby Mountains: Day 1
Road’s End in Lamoille Canyon to Island Lake
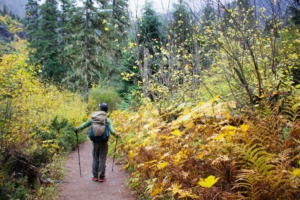
The hike up to Island Lake is doable in under an hour, but I’d allow for at least two when hiking this section in the spring months. The wildflowers are stellar along this trail, including geranium, delphiniums, Angelica, sunflowers, several types of paintbrush and so many more.
We also spotted various types of small birds living in the scrub and aspens along the trail, chipmunks scurrying amongst the rocks, and both bees and butterflies giving their attention to the wildflowers.
About halfway up the trail, if you look up at the right time, you’ll notice a set of granite “teeth” protruding from the wall above and to your left. A bridge crosses over the Island Lake drainage about three-quarters of the way to the lake.
Here is a great spot to notice how quickly you’ve climbed up from the valley floor. The total elevation gain from trailhead to the lake is just over 1,000 feet, but you’ll certainly be able to break up the climb as there are several “rest stops” along the way.
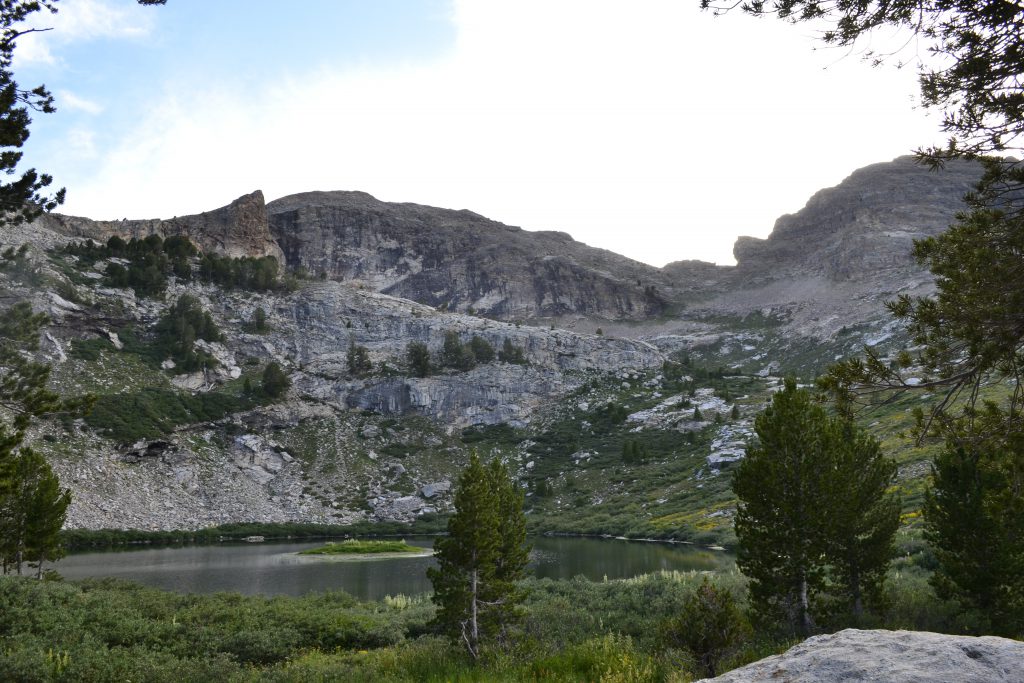
The lake itself is named, aptly, for the muddy island at its center. In spring and parts of summer, there is a stream running into the lake from the smaller ponds that are located just uphill and to the west.
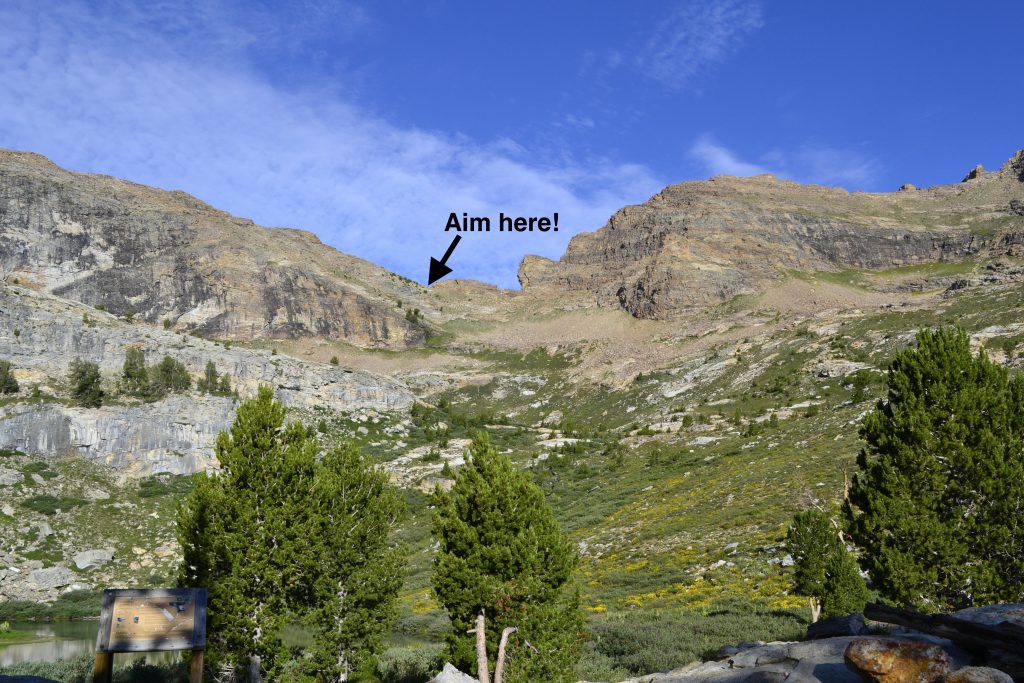
From here, you can see that the best approach to the pass into Thomas Canyon is around the north side of the lakes and to the point on the pass to the left of a big rock formation that resembles Pride Rock from The Lion King.
Today’s lesson from hiking in the Ruby Mountains: triple-check your pack! And if you think there’s something you need that you left behind, it’s not too late to go back and get it before you head over the pass into Thomas Canyon.
Hiking in the Ruby Mountains: Day 2
Island Lake to Goat Lake
Our second day started on the trail around 930 am after morning yoga, a breakfast of hot oatmeal, and the deconstruction of camp. The hike out of Island Lake to ‘Pride Rock Pass’ is about 1,300 feet of elevation gain over little more than a linear mile. The pass is at 10,800 feet and offers amazing views of the mountains to the east of Lamoille Canyon. It’ll also be your first look at what lies ahead in Thomas Canyon.
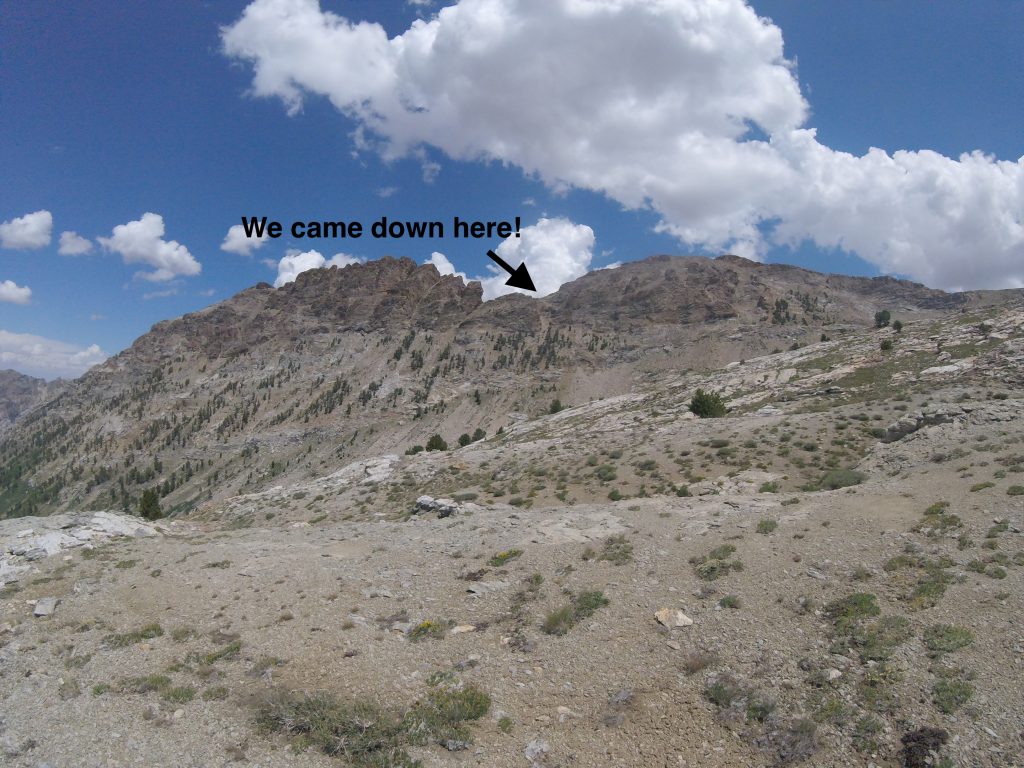
Coming down the backside of the pass is where the fun begins. You’ll be staring down a chute that, although it might require just seconds to ski in the winter (with the potential for a sweet cliff drop towards the bottom), is littered with scree in the spring, summer, and fall. Now you’ll know why today’s motto is “slow and steady.”
The descent down the chute to the treeline is steep with lots of loose footing. But it certainly is possible! Once you hit the treeline, you’ll want to head north down Thomas Canyon (your right if you’re facing downhill). Directly below are cliffs that you don’t want to mess with. When you make it about 200 yards north, however, you’ll find a little chute through the cliffs that is “sendable.”
Once we were down this chute, we took a quick rest break under a friendly pine and then made our way back south and up the canyon through the scree field and to the stream.
This is a great place to stop for a water fill if needed. Then, we kept a southwesterly route up from the stream to the saddle above the little beaver ponds that are visible in Thomas Canyon from Pride Rock Pass.
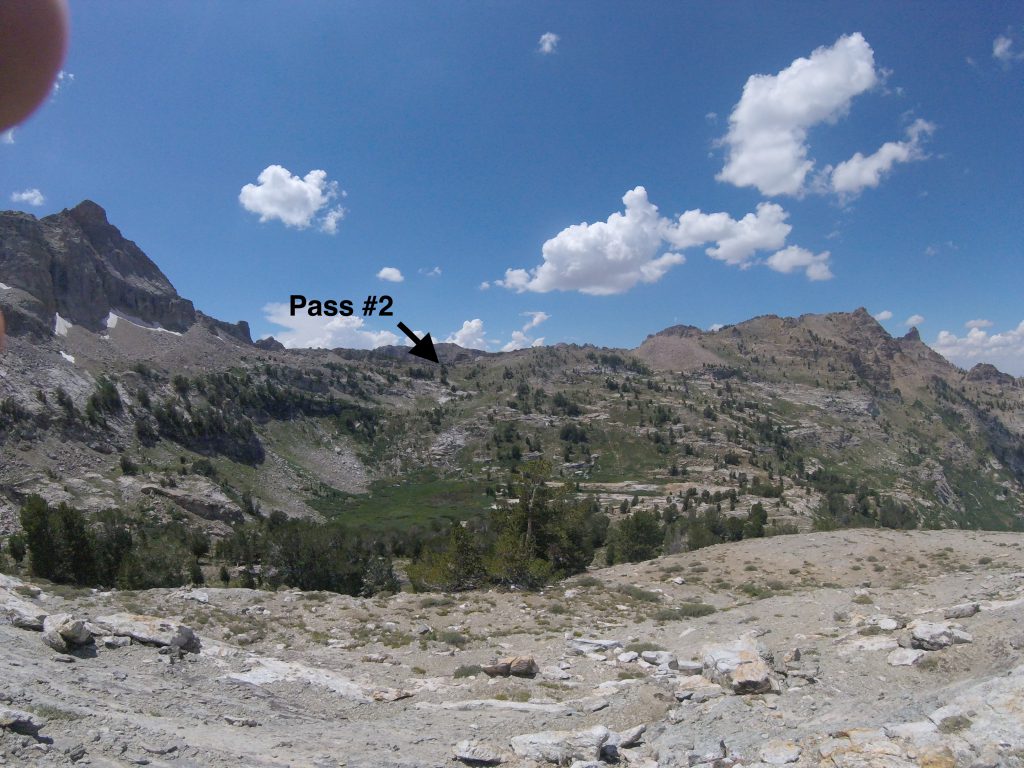
From here, we scrambled down around the northern end of the ponds and began our ascent of Pass #2 for the day. The ascent was less vertical feet than the climb up to Pride Rock Pass and the descent into Right Form Canyon was also much less difficult than the descent from Pride Rock Pass. From the pass, you’ll get your first look at Goat Lake at the far western edge of Right Form Canyon.
We stayed north again as we came down into the canyon, but as we neared the bottom we wound up heading back south to scoot around the south end of the small ponds at the bottom of the slope. There, we located a used (but far from well-worn) trail through the marshy area and around the ponds.
We continued west from the ponds but dropped away from the cliffs to our south in order to gain easier passage across and through one more small drainage before the final, and quick, climb up to Goat Lake.
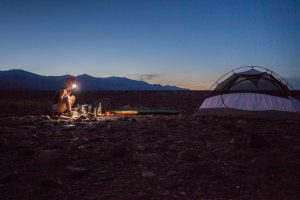
There is an epic tent site with a firepit here that we utilized but set our hammocks and tarp up at another smaller spot about 20 yards back downhill from the lake. The view out of Right Form Canyon from Goat Lake is truly incredible. You can see all the way down into the flatlands to the east of Elko and Spring Creek.
Today’s hike was about 5.5 miles in total, beginning at 9,676 feet of elevation and ending at about 9,300 feet. That entailed, however, about 2,000 feet of climbing and 2,300 feet of descending.
Today’s Lesson: “Slow and steady wins the race.”
Hiking in the Ruby Mountains: Day 3
Goat Lake to Echo Lake
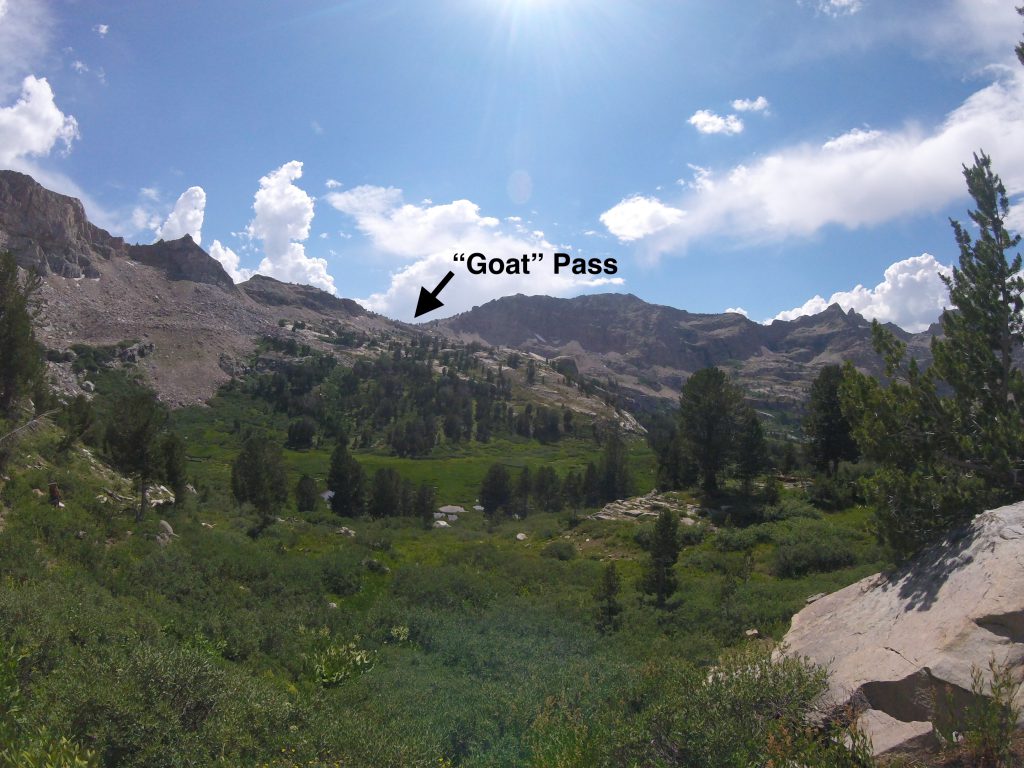
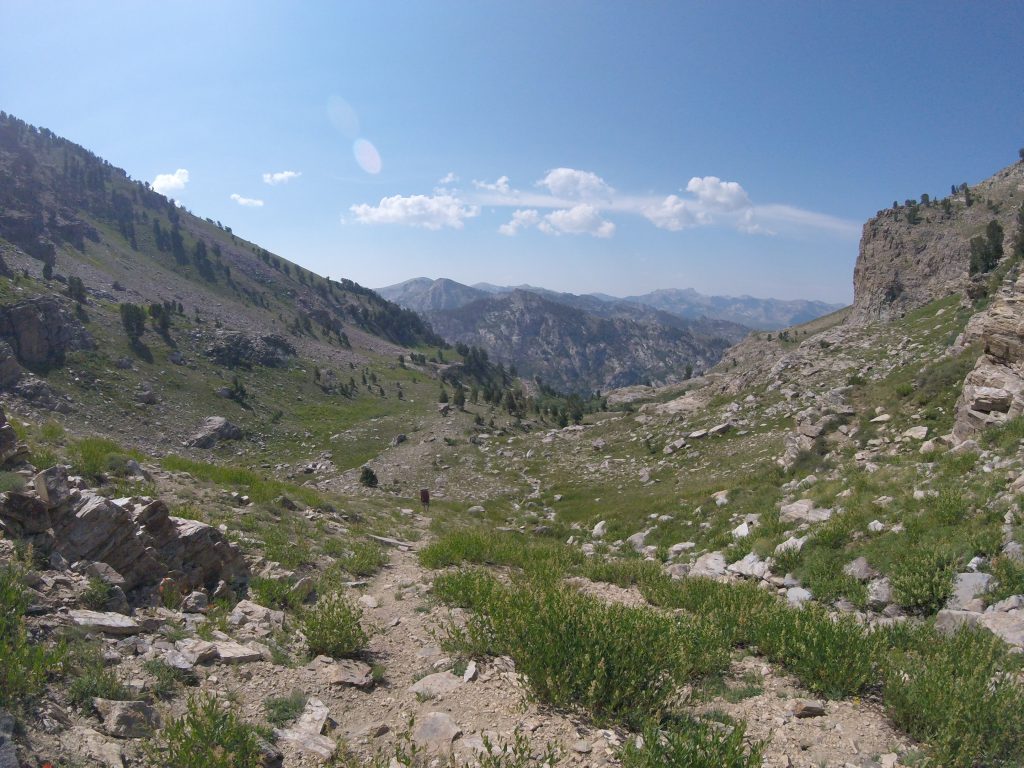
We had a little rain yesterday evening, but the hammock and tarp set up kept us nice and dry. We took a mellow morning and got on trail slightly after 11 am. From Goat Lake, we climbed south up to “Goat” Pass, which was another climb of a little over 1,100 feet.
At Goat Pass, we set our packs down and scouted up the ridge to the east. We were looking for Box Lake from the peak just east of Goat Pass, but no Box Lake could be seen from our vantage point. You will, however, get a great view of the pass you’ll take the next day that’ll take you from Box Canyon into Kleckner Canyon.
Anyhow, back to the pass we went, hauled our packs up, and continued west up the ridge to a point just below a small cliff section. Then, we continued to the right along the face and across a steep section of scree and small shrubs.
We climbed across and under another cliff section to hit the next ridgeline over. During this section, you want to do your best to maintain the elevation you gained during the climb up from Goat Pass.
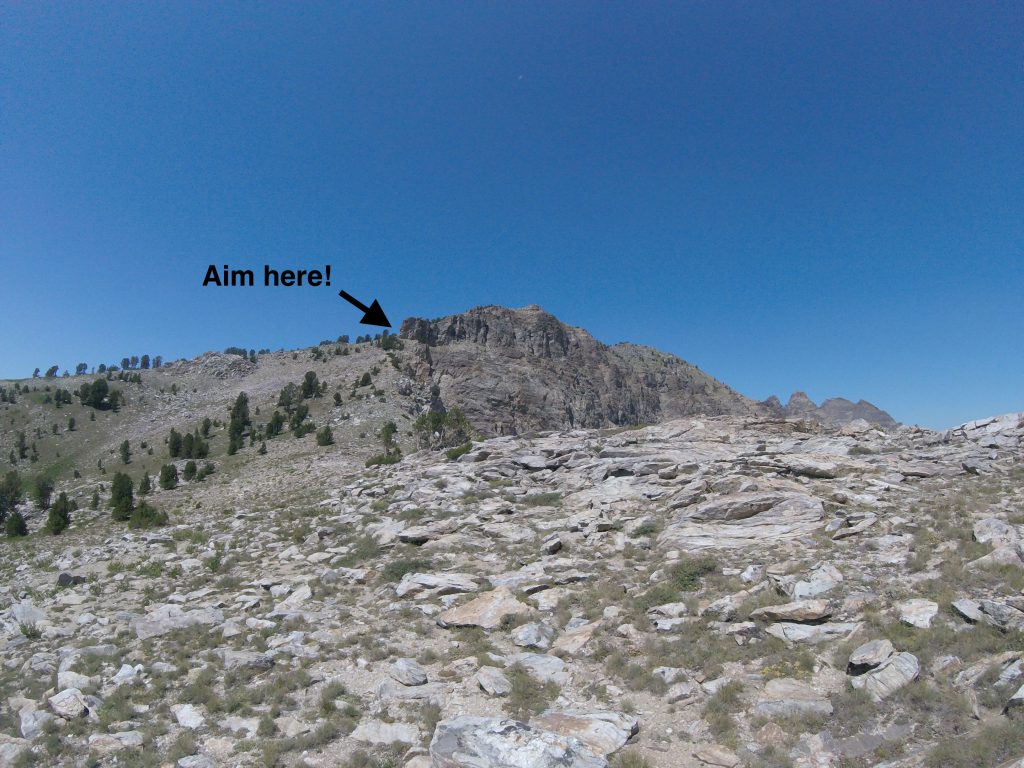
When we hit that next ridgeline, we turned up the ridge and continued to climb in elevation all the way along the west side of the ridge between Goat Lake (in Right Form Canyon) and Echo Lake to the west. This was our major mistake of the day.
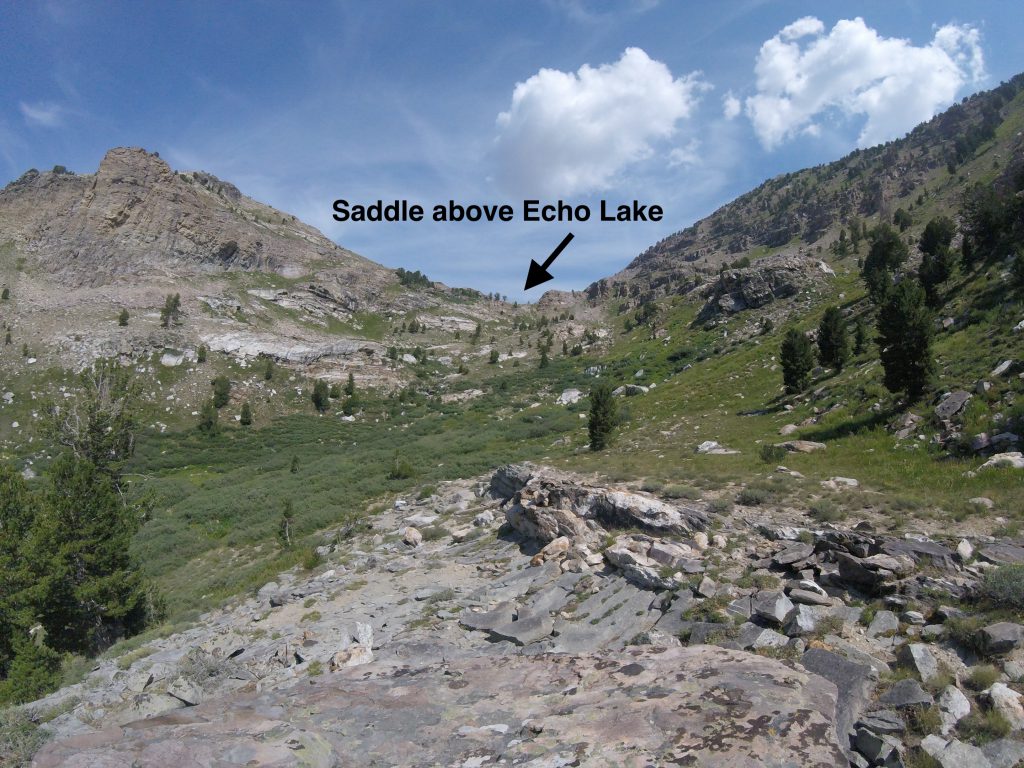
In reality, we should’ve proceeded down the third ridgeline over from Goat Pass and into the drainage to the southeast of Echo Lake. Then, you would turn back to the north and climb a set of three steppes up to the saddle above Echo Lake.
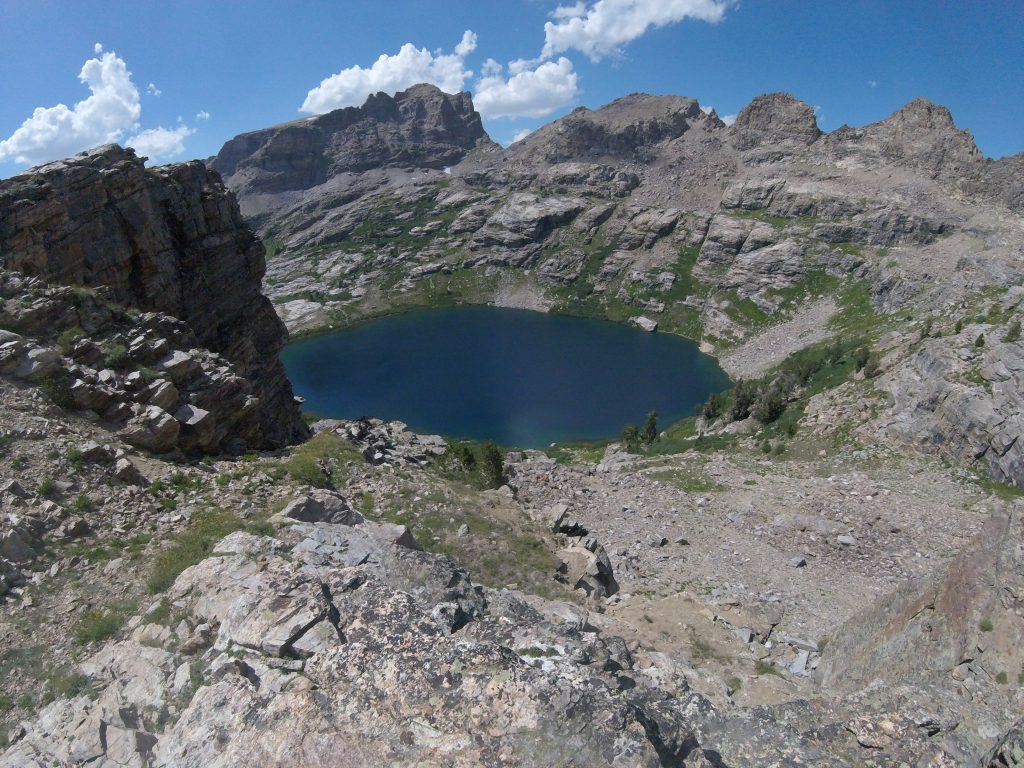
This mistake necessitated a bit of a steep downclimb to the saddle above Echo Lake, but we made it with just one pack lower and found ourselves staring at the scramble down and into Echo Lake.
This was another steep scramble, but getting down to the lake was a definite relief. We had to skirt the southern edge of the lake to the west to swim, filter water, and prep + eat dinner, but we found a great campsite on the northwestern edge of the lake complete with 2 firepits, tent + hammock spots, a spring of water in the ‘backyard’, and views of Echo Lake off the ‘back deck’.
All told, this was about a 4.5-mile day with 4.5 hours of hiking and about 1,800 feet of climbing and 1,300 feet descending.
Today’s Lesson: Re-check your guidebook and map at the first moment you feel like you might be a bit off-track. But, then again, if you find that you’ve gone way off track, don’t forget that this is a largely off-trail hike after all, and if you feel safe about your route, don’t hesitate to make your own way!
Hiking in the Ruby Mountains: Day 4
Echo Lake to Favre Lake
Happy Birthday to @jabroniejoe and @highsierrawildflowers! We started our day around 930 am out of Echo Lake. We were fortunate to chat with a few other gentlemen who were staying at Echo Lake and we took a look at one of their topo maps to solidify our route for the day.
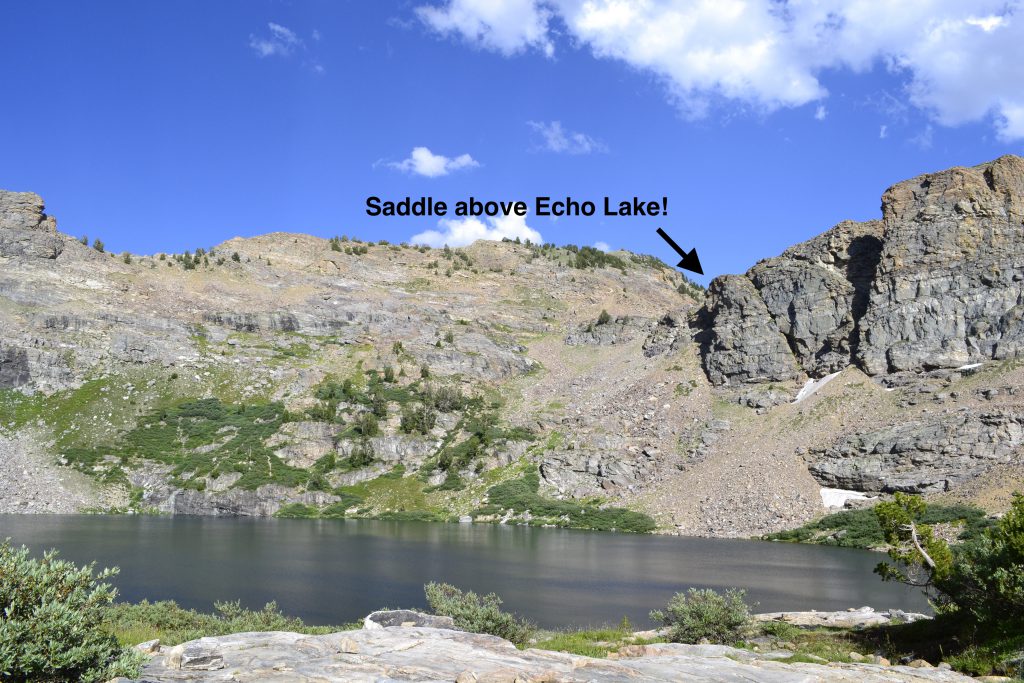
The climb back up to the saddle above Echo (where we stood the evening before) took less than 20 minutes and we were standing on the saddle by 10 am. Then, we started down into the drainage to the southeast of Echo Lake (the one we should’ve come up the day before).
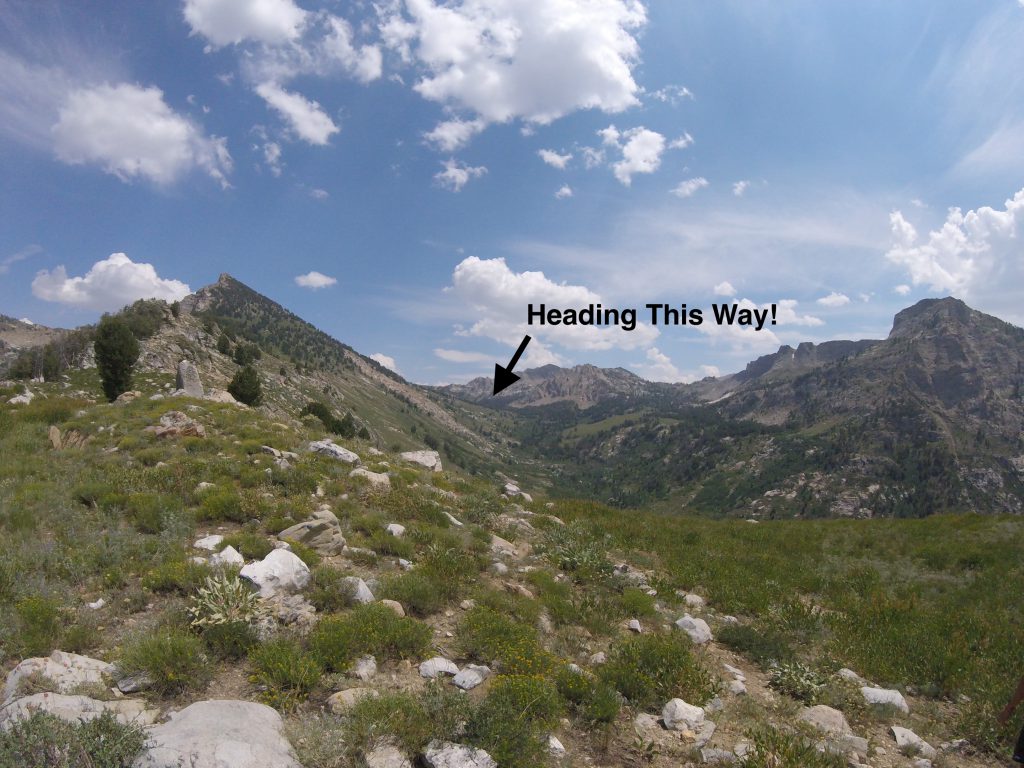
We stayed right down the first of three steppes before crossing over through the next steppe and skirting the east side of the drainage before coming around the ridge and continuing our descent eastward into Box Canyon.
At the bottom of Box Canyon, we started to pick up a faint game trail that led us to an amazing lunch spot on the bank of Box Creek. It was deep enough to dip your full body into at this time of year, so we did. After lunch, we continued up Box Canyon, following faint trails and general directional route finding (moving east up the canyon).
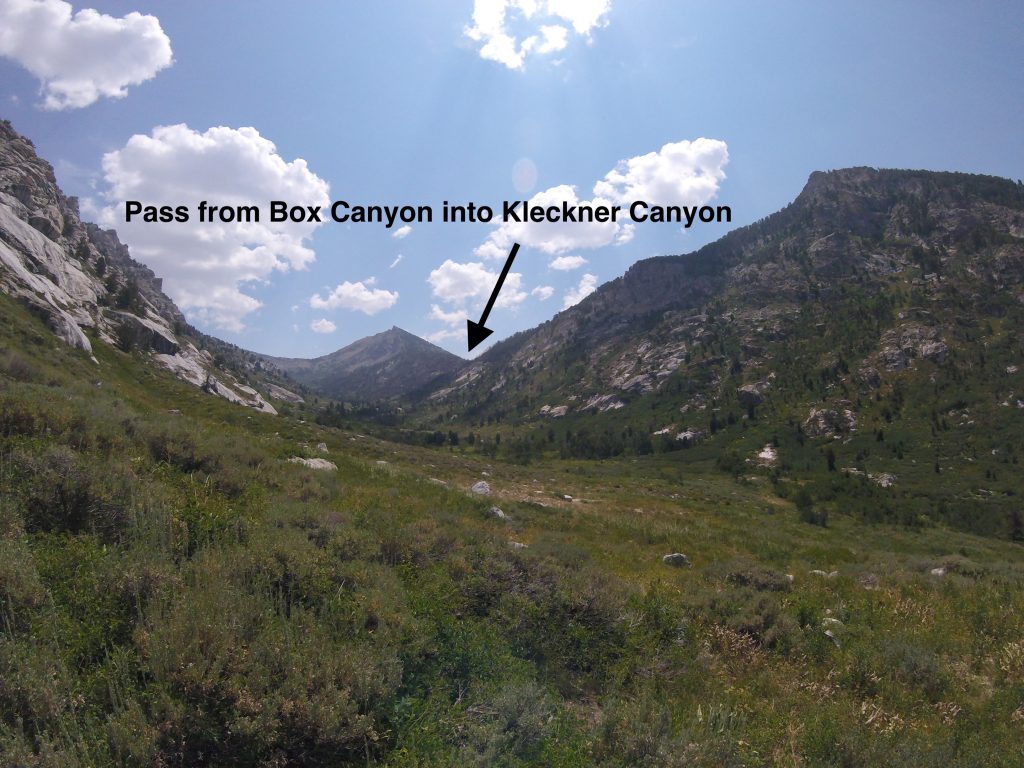
About three-quarters of a mile up the canyon, we found ourselves below the pass from Box Canyon into Kleckner Canyon. The climb was just over 800 feet in elevation and we picked up a pretty solid, although still certainly unmaintained trail that switchbacked us up.
We had a brief pack-down pit stop at the pass and then made our way east and down into Kleckner Canyon. All through the first half of Kleckner Canyon, we lost and re-found the “trail” several times, but continued east searching, always, for the path of least resistance.
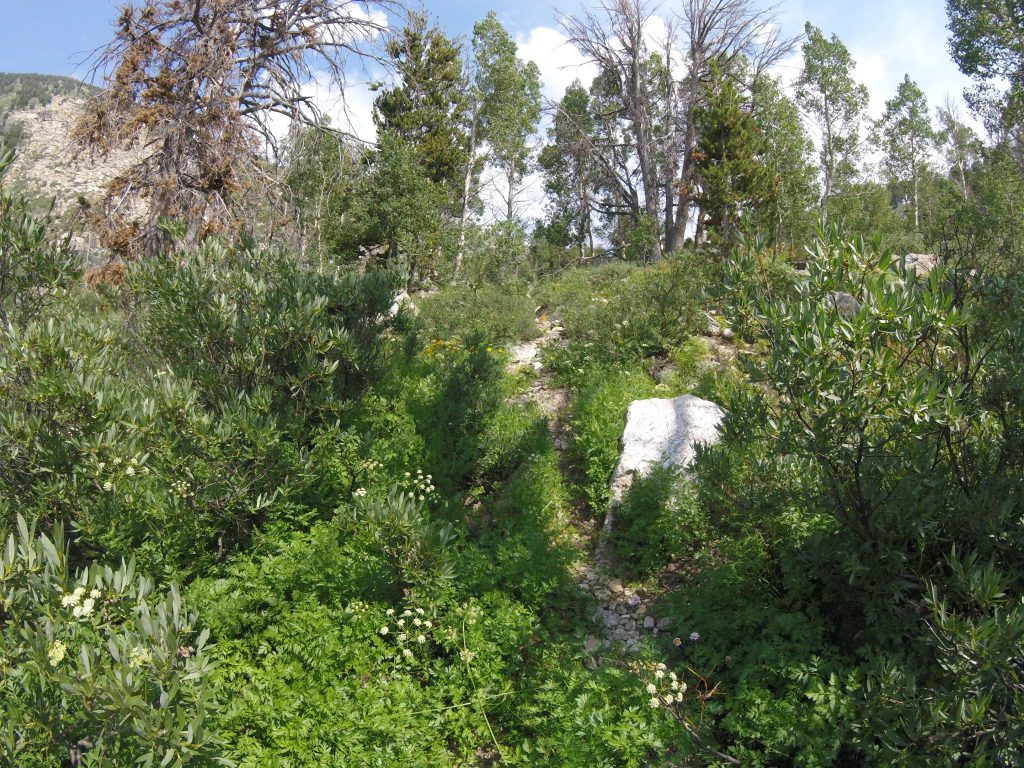
Eventually, the trail we were following became much clearer and it was obvious that it had seen more recent traffic. It led us up the right side of the canyon (south) and we intersected with the Ruby Crest Trail after about 2 miles in Kleckner Canyon.
From there, we continued east on an unnamed but well-trafficked trail along the southern ridge, which brought us up to the Favre Lake. By our calculations, our route from Echo Lake to Favre Lake, by way of Box + Kleckner Canyons, was about six miles in length with 2,130 feet of elevation gain and 2,460 feet of elevation loss.
Today’s Lesson: It sure helps to have the right map for the job!

Hiking in the Ruby Mountains: Day 5
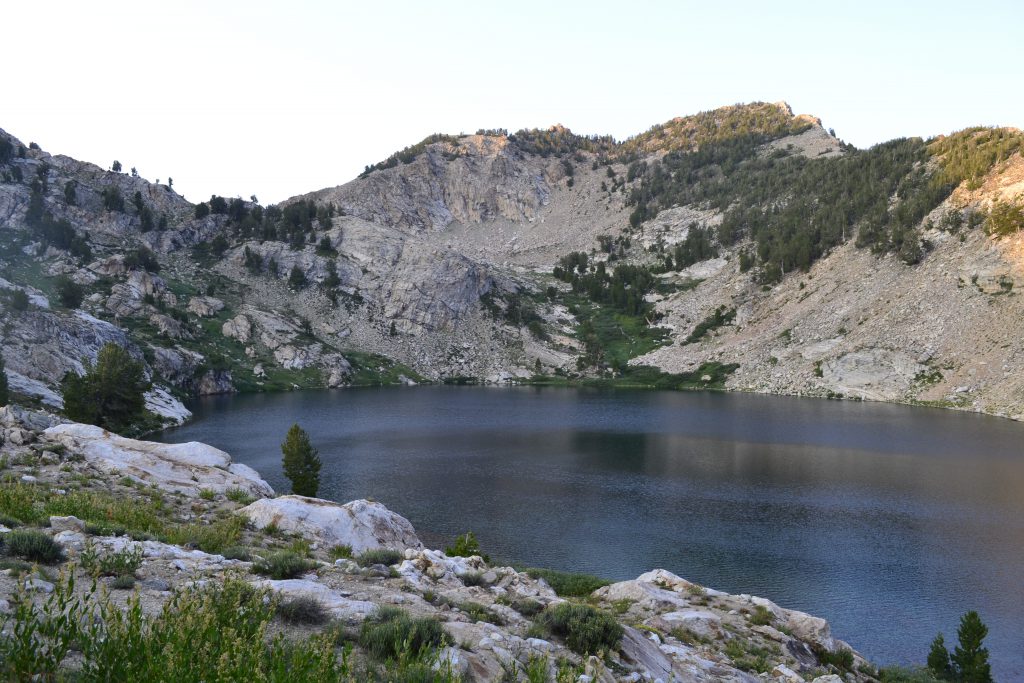
Favre Lake to Liberty Lake
We took a very mellow morning at Favre Lake and didn’t hit the trail until a little after midday. The hike from Favre to Liberty was just over a mile with about 300 feet of elevation gain. It flew by under our feet with a proper, maintained trail underneath us.
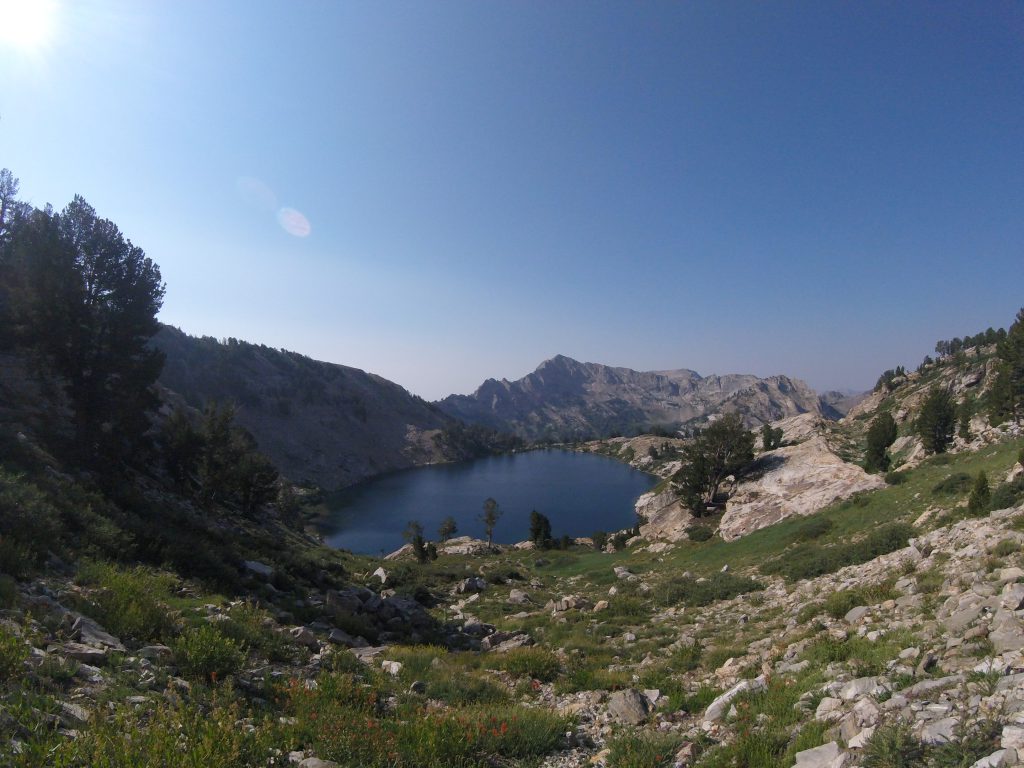
Liberty Lake is a gorgeous alpine cirque with big granite faces above and views of the peaks back to the south above Castle Lake. It’s certainly easy to hike out from Favre Lake in a matter of hours, but if you want to enjoy a final day in the wilderness, Liberty Lake is a can’t-miss location!
Hiking in the Ruby Mountains: Day 6
Liberty Lake to Lamoille Canyon Trailhead
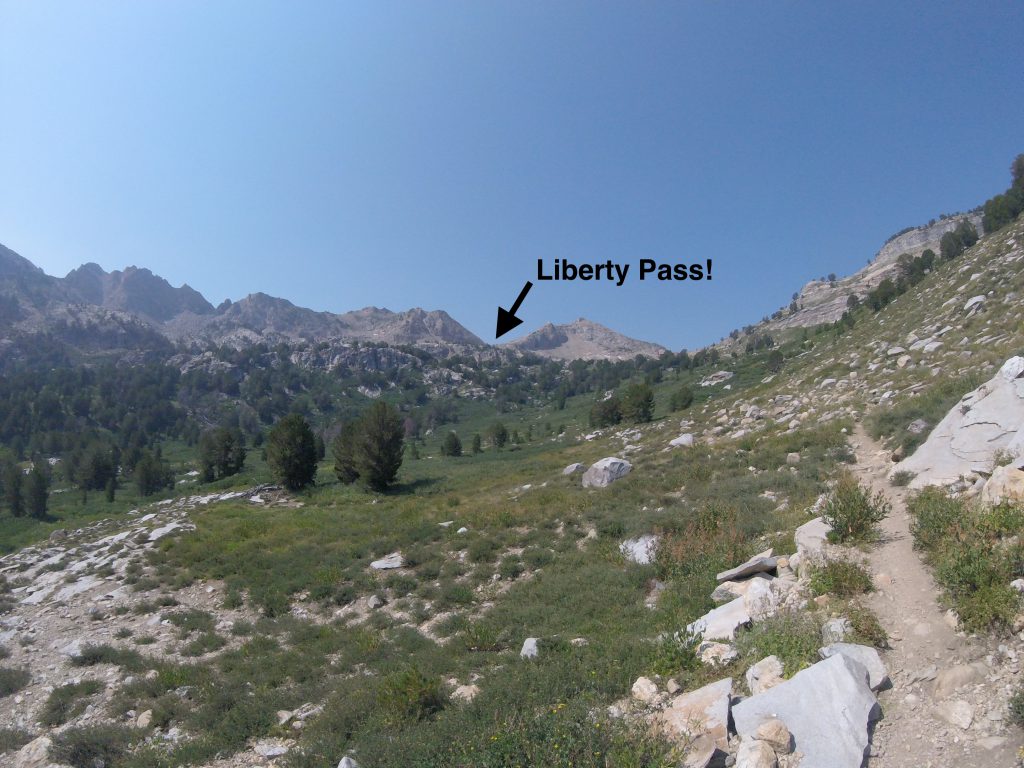
Our final morning was a blur. The hike from Liberty Lake back to the trailhead is about 3.5 miles with 400 feet of elevation gain and 1,600 feet of elevation to drop back to Road’s End. We hit the trail shortly after 8 am and were up at the pass into Lamoille Canyon a little under an hour later.
From here, it’s a little over two miles to descend back down to the parking area. You’ll have an opportunity to swim in Lamoille Lake or the Dollar Lakes on your way down if you choose.
The trail actually splits so that you can choose the western or eastern fork. Just for your reference, the western fork is about a half-mile shorter than the eastern alternative, but if you really want to see the Dollar Lakes, you’ll want to take the eastern fork.
Final Recommendations for Hiking in the Ruby Mountains
While we took six days to complete this trail, it certainly could be done in a shorter time frame. I would, however, recommend setting aside at least four days to truly take in the beauty of the Ruby Mountains and to not put your body through too much pain. In the end, we tallied roughly 7,600 vertical feet of climbing and descending over the course of about 22.5 miles.
Although this trail is not huge in the way of total mileage, the repetitive daily elevation gain and loss, especially on untraveled and uneven terrain, takes its toll. Give yourself the time you need to take it easy and allow your body to rest and recover at the end of each day.
With that said, here are a few final recommendations on hiking in the Ruby Mountains:
If you need any supplies before heading out to the trailhead at Lamoille Canyon, the best stop is actually in Elko. We found what we needed between the local Wal-Mart and the Big 5 Sporting Goods store. I don’t recommend going all the way to Spring Creek before doing your final shopping, as your options will be very minimal at that point.
If you’re questioning whether or not to bring rain gear, don’t! Although we got very lucky and only experienced one evening of rain, every day posed a slight threat and we felt much better being prepared in the case that the skies did open up.
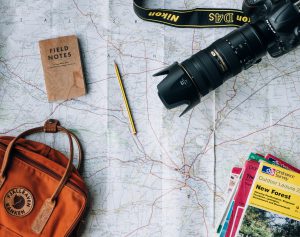
If you need maps before hiking in the Ruby Mountains, we made a stop at the local Forest Service office outside of Elko. You’re looking for the Elko office of the Mountain City-Ruby Mountains-Jarbridge Ranger District.
Here is their website: Humboldt-Toiyabe National Forest. I will tell you, though, that the maps they had weren’t all too detailed. There are other places you can order topo maps, and you can also use a website like TopoZone to print your own custom maps.
It is essential to replace the nutrients you’ve burned throughout the day. The main one, of course, is water, but the food is equally important. Don’t hesitate to bring an extra Mountain House (or two) along on this trip.
Never turn down an opportunity to eat one final meal in civilization before heading out on the trail, especially if the start of your trip is slightly delayed by rain.
And last but not least, beware of trusting 4-year old trail guides. Utilize all available tools to find the best route but, most of all, trust your instincts, be willing to turn around, and make sure you’re ready and able to handle any and all situations that our beloved Mother Nature might throw at you!
Disclaimer for Hiking in the Ruby Mountains
When we say Lakes Loop “Trail” it suggests that this entire hike was “on trail”. That is far from the truth. In fact, after the brief, initial climb from the parking lot up to Island Lake, the next three days of the trip were 99% off-trail.
Sure, there were points where we followed faint game trails and remnants of human activity, but this trip requires great route-finding and navigation skills. It’s also one of the more difficult hikes we’ve ever embarked on, despite the relatively low total mileage spread over 6 days.
I suggest that you be highly comfortable with off-trail hiking and navigation before attempting the Lakes Loop Trail when hiking in the Ruby Mountains.
About The Backpack Guide
I’m always looking for new trails and wildernesses to explore. If you have any recommendations for hiking in the Ruby Mountains, I’d love to hear from you! And I’d also love to hear from anyone out there that has completed the Lakes Loop Trail in the Rubies in the past. How does your trip compare to ours? What was similar or different? When did you go?
Tell me everything! Also, let me know if you’d like to write your review! Drop me a line here or find me on social media @thebackpackguide on Instagram and Facebook.
I hope you’ve enjoyed this trail guide and I’d love to hear your feedback in the comments section below. I’ll be quick to reply to any questions, comments, or concerns you feel like sharing!
Hike with a Tight (You-Know-What)!
The Backpack Guide
Comments
This is a really beautiful place. I would love to go hiking but it’s scary hiking places like that, a little too wild for me. I generally do hiking on small man made trails.
One day I’d cough up the nerve to go this big, not only is it a lot of work but theres so many dangers out there. But I like that people do tutorials on how to hike a certain trail.
Your reviews are always great to read. The in depth direction and the imagery make me feel like I am there. This is a great article.
I am looking for a nice back packing trek (first one with the fam). With 2 little ones age 4 do you have any suggestions? I feel like the Rubies may be a bit of a stretch for first time. Or do you think there may be some lighter trails within?
Nic
Author
Thank you very much for your kinds words! There are definitely some lighter trails within that I would say are doable with your little ones. The trail from the end of Lamoille Canyon up to Lamoille Lake or the Dollar lakes are certainly attainable. Lamoille Lake looked like the better camp spot in this area to me, but I could be wrong. Other great (and easily attainable) overnighters in my original neck of the woods (Lake Tahoe) include Long Lake and Azalea Lake. Hope that’s helpful!
Wow! Sounds like an amazing hike and definitely one I will be trying out. I love hiking and am currently training myself so that I can do one of the big thru hikes like PCT, Appalachian etc. I just feel like one of these hikes has to be something I do before I die and I really want to prove to myself that I can do it and push my limits. Lovely to hear about you hike, would love to hear your opinions on what sort of hikes I should be doing in prep for a big thru hike 🙂
Author
Hi Celeste! Thanks for your comment. The short answer is, of course, any hiking is better than no hiking! As for training, it depends on where you live and what kind of terrain you have access to. I’ve only hiked sections of the PCT, but I can tell you that you’ll experience a lot of different terrain, and you definitely want to be as prepared as possible for altitude on that one!
Hi Tucker,
Great write-on on this trip. I would like to do this with my adult kids this summer. You mentioned a group at Echo Lake, but did you see any others on this loop? We like the remote places, such as this. I have the USGS topo maps, but do you have a suggested trail guide booklet for this loop? I would also like to see some photos of the rock screes, if possible, at Pride Pass and others. My knees generally don’t like those. LOL
Thanks so much.
Dave
Hey Dave!
Thanks for the friendly feedback on this write up! It’s one of my favorites so far!
Do you mind if I email you directly with the answers to your questions?
It might take me a day or two to compile some useful resources for you!
Tucker, this looks awesome. I’m thinking about doing this loop next week. Do you have GPS tracks you can share? Or are there any other resources that you’d point to that would be helpful for finding the right way out there?
Author
Hey Dan!
I don’t have GPS waypoints or tracks for this hike, unfortunately. I wound up downloading this webpage to my phone: http://www.backpackingintherubymountains.info/trailinfo/lakesloop/lakesloop.html
That wound up serving as a guide for our trip and we did stop to pick up a topo map at the Ranger Station in Spring Creek, I believe. The map we chose wasn’t as detailed as we would’ve liked, however. And we ran into several gentlemen at Echo Lake that had a much better topo than ours. I’m not sure where they found it, but I’m sure you can find something if you do a little digging.
Personally, I’d still recommend stopping at the Ranger Station just to check in on current conditions. I’ve just found that to be a best practice whenever I hike in an area that I’m slightly unfamiliar with.
Other than that, I just want to reiterate that the second, third, and fourth days of this hike (according to my guide) were ALL off-trail. And the only section that I think we botched was from ‘Goat Lake’ to Echo Lake. If my guide isn’t clear enough on that section, feel free to email me directly and I’ll provide further tips.
Best of luck!
Hi Tucker,
I really really enjoyed reading your excellent hiking guide for the Ruby Mts. Lakes Loop Trail. The pictures were awesome. I felt like I was right there with you and JJ! I hiked parts of the Ruby Crest Trail many years ago (decades ago really, in the 1970s) and so your pictures really brought back great memories. In a group of maybe five of us, we actually hiked a similar off-trail route, but not exactly the same route you did; for example I never experienced hiking in Box or Kleckner Canyons. I plan to ride my road bike up Lamoile Canyon road this coming May 2021, but you may be aware that there was a devistating wild fire in 2018 up the that canyon, but I don’t think that the fire made it all the way to the top, so the parking lot area at the end of the Lamoile Canyon road I think was not affected nor any of the areas around the Ruby Crest Trail. At least that is my hope.
Author
Thanks David!
I actually didn’t hear about the fire. That canyon was SO abundant with life when we were there, so it’s hard to imagine what it looks like now.
But having seen fires rage through California for most of my life, I’m hopeful that it will come back beautiful once again!