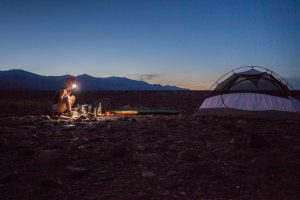
Today, we’re going to look at five hiking pole tips for safety and efficiency. These tips will help you choose the best set of poles for you and use them to the best of your ability.
As a younger man, I often wondered why people relied on hiking poles. I liked keeping my hands free and never felt the need for additional support. But as I’ve gotten older, I’ve found comfort and support in a pair of the best trekking poles.
Let’s explore whether it’s time for you to make the transition too!
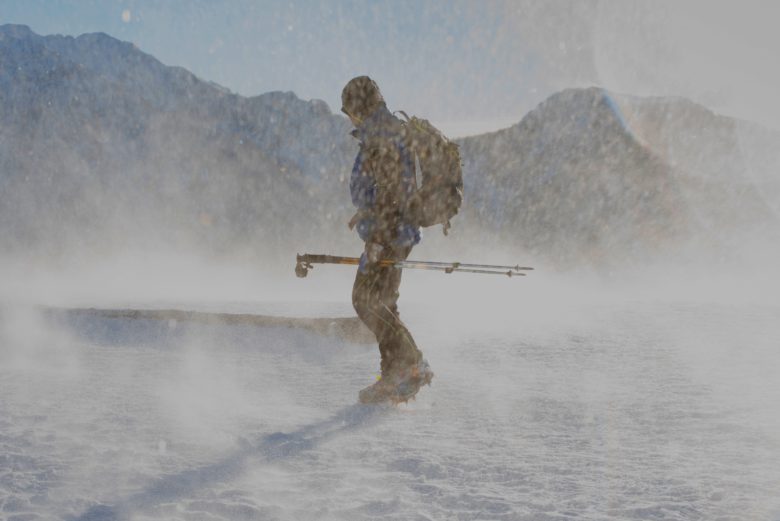
Hiking Pole Tip #1: Understanding Pole Types
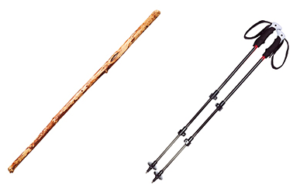
For starters, hiking poles can be broken down into those that come in pairs and those that would be more traditionally referred to as “hiking staffs.” The latter is what many of us carved from fallen branches in our earliest days of hiking.
Hiking staffs are best suited for relatively flat terrain. They are also best employed when you’re carrying a very lightweight pack (or no pack at all!). Some modern hiking staffs can be adjusted to your desired length and the fanciest models include features like a built-in camera mount and a shock-absorbing component to reduce impact.
The former (hiking poles that come in a set of two) are better suited for hiking and extended backpacking trips that will offer a wide variety of terrain.
A pair of hiking poles will provide added stability while also reducing the overall impact on your knees. Some even include internal shock absorbers to further reduce impact and most, if not all, are adjustable.
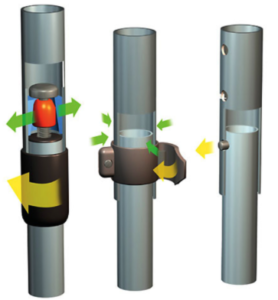
When it comes to adjustment mechanisms, there are three major types that I’ve encountered: the twist-lock, the flip-lock, and the button-lock. I’ll briefly highlight each and then tell you my recommendation. The twist-lock mechanism is a good old-fashioned “righty-tighty, lefty-loosey” system.
They include an internal mechanism that expands when twisted to the right to “lock” the poles in at your desired length. It’s an easy system, but can be susceptible to malfunctioning in cold temperatures and also don’t seem to be as durable as the other mechanisms.
The flip-lock (or ‘lever-lock’) mechanism uses a tab with an attached internal ‘bolt’ that keeps the pole locked in place when closed. Some more complex designs require some getting used to but, in the long haul, flip-locks tend to greatly outlast their twist-lock counterparts and are less susceptible to environmental extremes.
The last locking mechanism is one that I wish I saw more of out there. Alas, it seems to be going by the wayside with the popular adoption of the flip-lock.
The button-lock mechanism uses a button with several established length options. This ‘button’ is pushed down and the pole is then extended or contracted to the desired length. They are also sometimes called ‘snap-locks’, as the button will make a snapping noise when it reaches a new height.
In my experience, poles with the button-lock mechanism are great for cold temperatures and they’re much easier to operate with gloves on than the twist-lock mechanism.
Hiking Pole Tip #2: Getting the Right Pole Size
The nice part about most hiking poles (and some hiking staffs) is that they can be adjusted to fit a wide variety of body types. If you’re interested in a set of hiking poles that aren’t adjustable, however, it’s really important to choose the right size.
Poles that are too small will be much less effective and can cause the user to hunch their back and, as a result, compromise proper walking form. Poles that are too long, on the other hand, can cause the user to shrug their shoulders and put unnecessary strain on the upper back and shoulders. We are looking for the ‘Goldilocks Zone’ here folks!
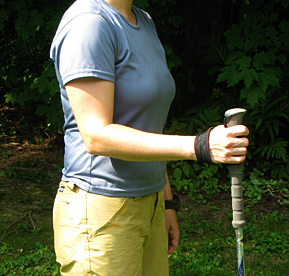
Measuring your ideal hiking pole length is simple. Stand on flat ground. Hug your elbows to your side and bend them to 90 degrees so that your hands are out in front of your body. Make fists. Then have a partner measure from the top of your hands to the ground.
This measurement is your ideal hiking pole length. If that’s a little too complicated, you can always check out this awesome Hiking Pole Sizing Chart from our friends at Montem Life!
One final point I’ll mention is that it can’t hurt to go a tad long on your hiking pole length (i.e. bending your elbows to a bit more acute of an angle than a straight-90). As we discuss how to properly use hiking poles in the next section, the reason behind this tip will become more clear.
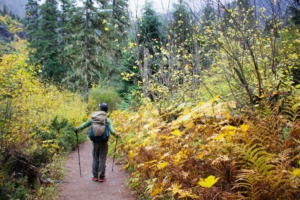
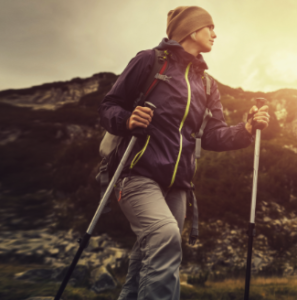
Hiking Pole Tip #3: How to Use Hiking Poles
Some of this might be elementary for some, but as an outdoor guide, I’ve seen far too many people using hiking poles incorrectly. In this section, we are going to discuss some important tips for how to use your hiking poles correctly on your next hike.
The first tip is to alternately plant your poles in relation to your legs. What do I mean by this? To illustrate, I’ll tell a quick story:
I played football in high school. One of the biggest linemen on our team was a force to be reckoned with and someone that was physically intimidating when he ran towards you. In fact, there was something unique about the way he ran that made him intimidating, but nobody put their finger on it until our senior year.
Then, one cardio day, our coach pointed out that he ran ‘same arm, same leg’. What he meant by that is that when his right leg came forward so did his right arm and vice versa. If it sounds strange, that’s because it is! Give it a try, it feels weird, right?
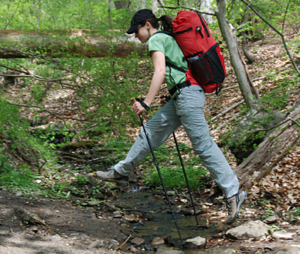
Anyhow, I tell that story because ‘same arm, same leg’ is NOT the proper way to use hiking poles. You should be planting the pole in your right hand when stepping forward with your left foot, and vice versa. This is the first step (cough, ha!) to using hiking poles correctly.
The next important tip is to actually plant your poles just behind your hips as you walk. With your elbows at 90 degrees and the poles slightly angled behind you, this should occur naturally. But I’ve seen far too many people trying to ‘pull’ themselves up a steep incline with their hiking poles.
This is possible, but it’s much more difficult than ‘pushing’ yourself up. Trust me, the combination of bicep, tricep, shoulder, back, and abdominal muscles used when ‘pushing’ are much, much stronger than just the tricep muscles used when trying to pull.
The final tip that I’ll provide on using your hiking poles is known as ‘double-planting’. This is when you plant both poles at once, take two steps, plant both poles again, take another two steps, and repeat. This is a useful technique on especially steep or slippery terrain and helps by ensuring at least three very stabled points of contact with the ground at all times.
Hiking Pole Tip #4: How to Clean Trekking Poles
Believe it or not, hiking poles can and should be cleaned frequently. Dust, dirt, and debris are the primary culprits responsible for causing the locking mechanisms on many hiking poles to malfunction. Keeping your poles clean after every use will significantly improve their longevity. Here’s how you can effectively clean your hiking poles:
Grab These Easy-to-Find Supplies:
– A wire coat hanger
– A damp rag or cloth
Follow These Easy Steps:
– Extend the poles to their maximum length
– Use the rag or cloth to wipes down the poles and clean off all dirt and debris
– Take the poles apart and attach the cloth or rag to the wire coat hanger
– Clean the inside of the poles using the wire coat hanger/cloth combo (avoid scratching or applying excessive force)
– Remove any retainer clips and clean screw threads with a damp cloth
– Keep poles detached in a cool, dry place until the next use
Additional Tips:
– If you start to find rust on your hiking poles, apply rubbing alcohol or WD-40 to damp cloth to remove
– Check for cracks in the pole shafts and locking mechanism while cleaning
– Always make sure to consult the manufacturer’s recommendations for cleaning specific hiking poles
Hiking Pole Tip #5: How to Replace Hiking Poles
The tips in the previous section are designed to help you maximize the life of your next pair of hiking poles (or the ones you already have!). However, I recognize that there may come a time when you need (or want) to replace your hiking poles.
Fortunately, many hiking pole brands offer great warranties. Here are quick links to the warranty offerings for some of the most popular hiking pole brands: LEKI, Black Diamond, Kelty, Montem, Mountainsmith.
If you’re not ready to pop for another top-of-the-line set of hiking poles to replace the poles you’ve grown to love over the years, there are a number of sites that offer older poles at deeply discounted rates.
Or…
Or…
And Last But Not Least…
Are These Hiking Pole Tips Helpful? Do You Have Questions?
As The Backpack Guide, I’m always looking for new trails and wildernesses to explore and I’m also interested in the experiences of others in the wild. Now that you’ve read this article, I’d love to know if these suggestions are new to you and, if so, what you think about putting them to practice on your next backpacking trip. If this article brought up any questions, I’d love to hear them!
Feel free to reach out to me directly (email below), or share your adventure by tagging @thebackpackguide on Instagram!
I hope you’ve enjoyed these 5 Hiking Pole Tips and I’d love to hear your feedback in the comments section below. I’ll be quick to reply to any questions, comments, or concerns you feel like sharing!
“We don’t stop hiking because we grow old –
We grow old because we stop hiking.”
– Finis Mitchel
The Backpack Guide